Steps to allocate license for customers
KB ID : 115902
License Allocation Steps For Customer
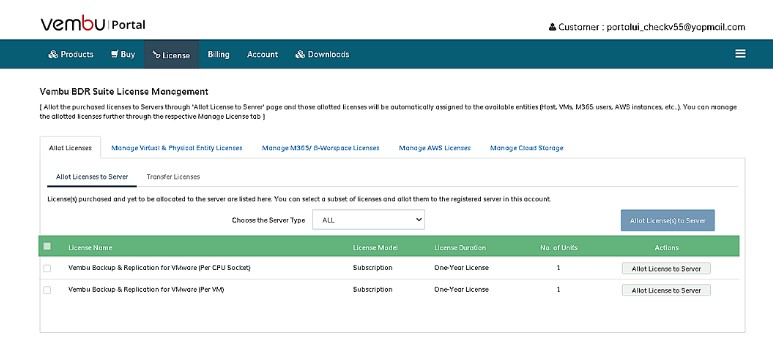
- Go to the Customers portal console of the respective account to allot licenses to your customer.
- Navigate to the “License” tab in the portal console.
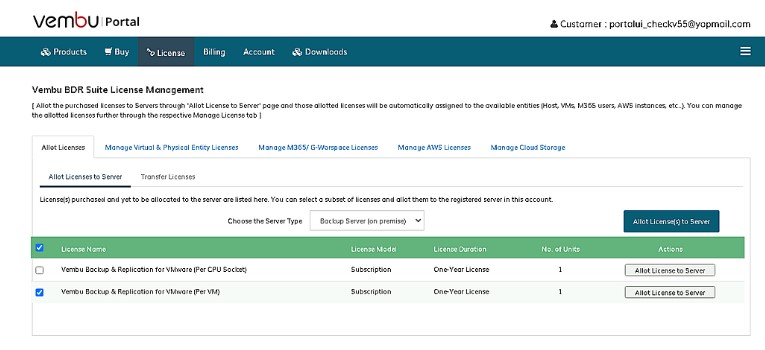
- On the customer's License page, choose the “ Allot Licenses -> Allot Licenses to Server option, where you choose the server type and allot the purchased license to that server.”
- After selecting the concerned server type, you can click on the Allot License to the Server button alongside the listed license details.
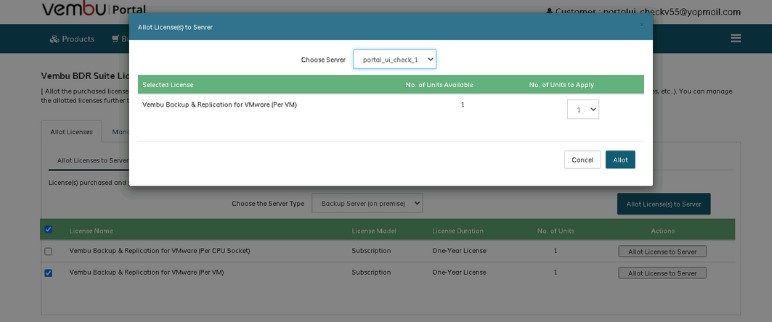
- Once done you will see a pop-up asking you to choose the Server from the list to which the license has to be allotted.
- Click on the “Allot” button to allot to the selected server.
- After successful allocation to the server, the license will get auto-allocated to the entities if “Run License Check” is triggered from the respective server’s.
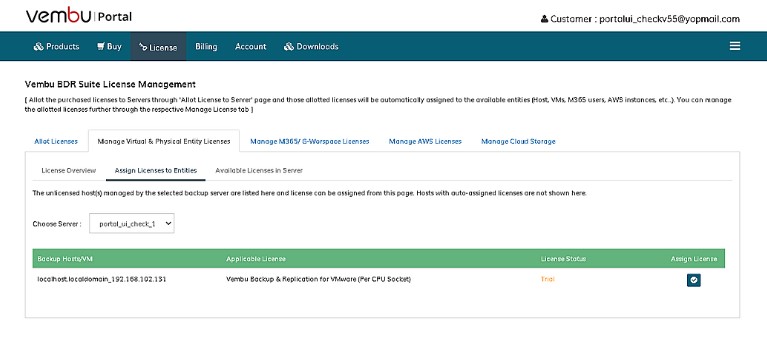
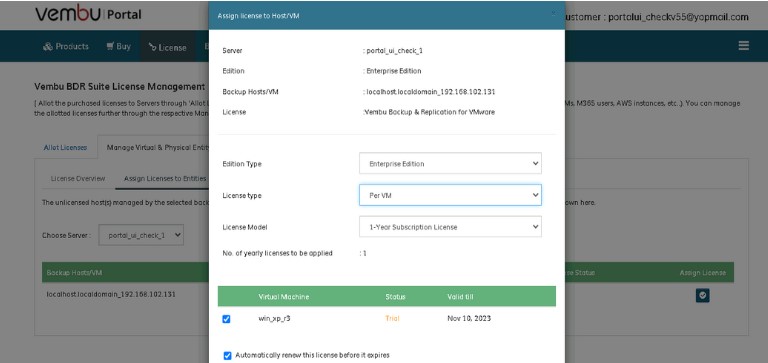
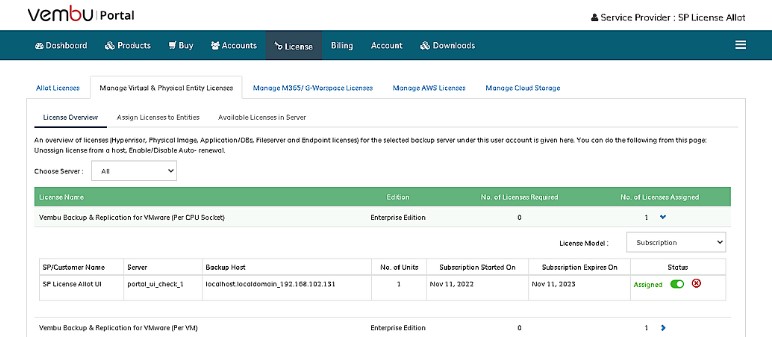
- To apply manually to the entities, please navigate to the “License -> Manage Virtual & Physical Entity Licenses -> Assign Licenses to Entities”.
- Click on the “Assign License” button with respect to the entities.
- Click on the “Apply” button in the pop-up window.
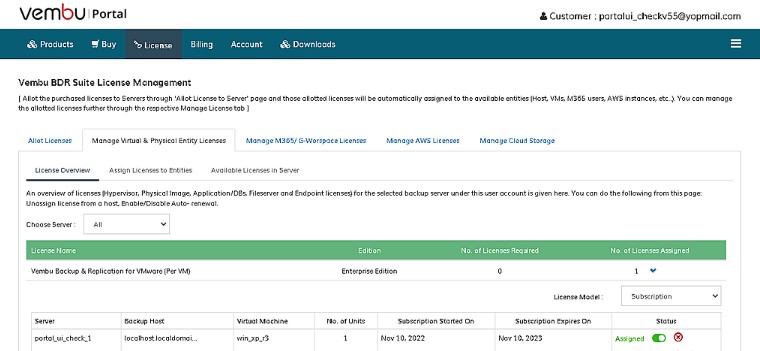
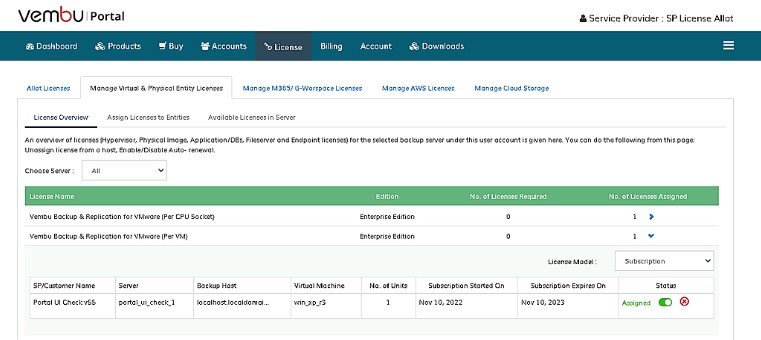
- Once after applying the license navigate to the “License - > Manage Virtual & Physical Entity Licenses -> License Overview” to view the active license entities.
- Allotting Licenses directly from the License tab for Service Provider
- To allot a license to your service provider or customer’s under service provider, you can directly navigate to the License tab in a service provider portal console.
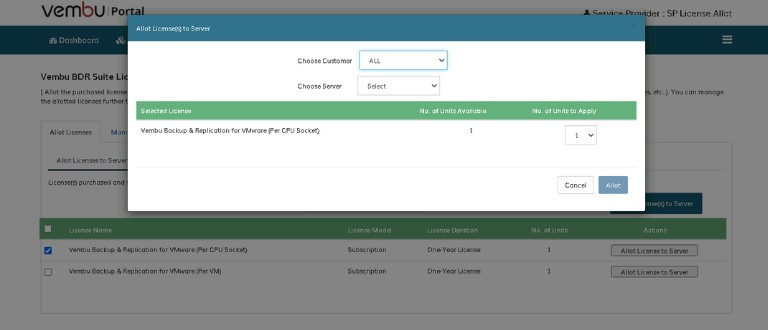
- Under the Allot Licenses to SP/ Customer tab, choose the server type and click on Allot Licenses to SP/ Customer button alongside the licenses.
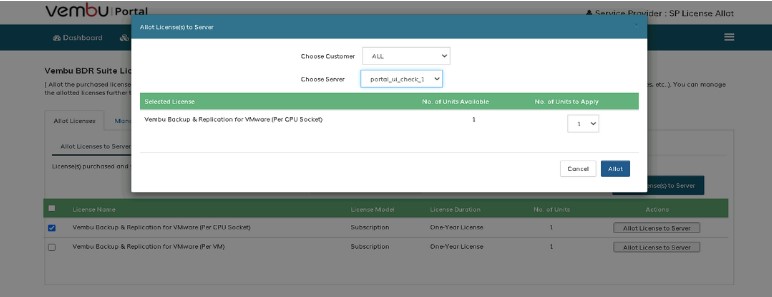
- Once done you will see a pop-up asking you to allot the license by choosing either the service provider or the customer’s in the “Choose Customer” drop-down.
- Once after choosing the option the related server will be listed in choose server tab.
- You can view the allotted licenses on “Manage Virtual & Physical Entity Licenses” tab based on both Server and Organization level active licenses of both SP’s server and SP’s Customer server.
Related Articles
License Management
An overview of licenses for the selected backup server under the particular user account will be discussed in this section under the Licenses tab. In this section, one gets to manage the licenses. License Overview Navigate to License tab -> Manage ...License Purchase
There are two licensing models available to purchase a license for the product, and you get to choose one among them. Let us see the purchase of Portal credits option because using the portal credits you can purchase the license; Portal Credits ...License Management (Backup Server Registration & License Check)
To register your BDRSuite Backup Server with the BDRSuite Portal, it is necessary to create a BDRSuite Portal Account. The portal serves as a centralized platform where you can efficiently manage all your products and services. For detailed ...How to Purchase a License
KB ID: 106 Challenge: To purchase a license from the BDRSuite Portal. Solution: To buy a license from the BDRSuite Portal, follow the steps below: 1. Log in to your BDRSuite Portal account via [https://portal.vembu.com](https://portal.vembu.com). 2. ...How to Renew Your License through Vembu Portal
ID: 115038 Cause: This knowledge base article provides guidance on renewing your license through the Vembu Portal, whether it's before or after the license expiry date. Solution: Renewing Before License Expiry: 1. Login to Vembu Portal: Access the ...
